I finally had it with my DIM GSE body. I have it for Lilya, and since she’s one of my human characters, she actually needs to know how to pose naturally. Especially to sit. (My fantasy characters mostly just stand around so posing for them isn’t as necessary.) And her body is otherwise very flexible, but is has one huge flaw: a boob joint. Not only does it not move well, but when it does it makes her boobs smaller when bending it forward -which I do, because I want her to sit naturally (I wish) and it gives her a ginormous hunchback at the end of the arched back. Which is just downright unnatural.
So, I’ve been playing with the thought of glueing and epoxying the boob joint shut and just sawing her torso in half at the waist. Really, I’d prefer to just buy her a new body, but there are no options for her size. Her face is huge, and anything with shoulders less than 9cm (including arms) is just too small. Her body is too tall for her, way too tall, but again, since she needs wide shoulders there are no options for shorter bodies. Except the one she came with: Iplehouse JID, but I sold that for a reason. I will eventually try to get her a new head which is hopefully smaller than her current one, but I’m waiting for owner photos to confirm that it’s actually smaller in size.
But yes, as I am out of options, I decided to finally just go for the mod. It couldn’t possibly make her worse than she already is. I mean, all her other limbs work really well, so it’s a waste to have a useless torso. And it’s very long anyway, so shortening it is not a big issue.
I was asked to document the process, so I did. You can jump straight to the results, if you’re not interested in watching resin get sawed and sanded.
Okay, so let’s start from the very beginning:
Planning & prep


This is what I had to work with. A very curved chest-jointed torso.


I started by removing the stopper. I couldn’t leave it in because it would make stringing very difficult, and I also wanted to make use of it.
Luckily the glue let go fairly easily. All I had to do was to edge a knife into the gap and slowly widen it until the glue gave out.

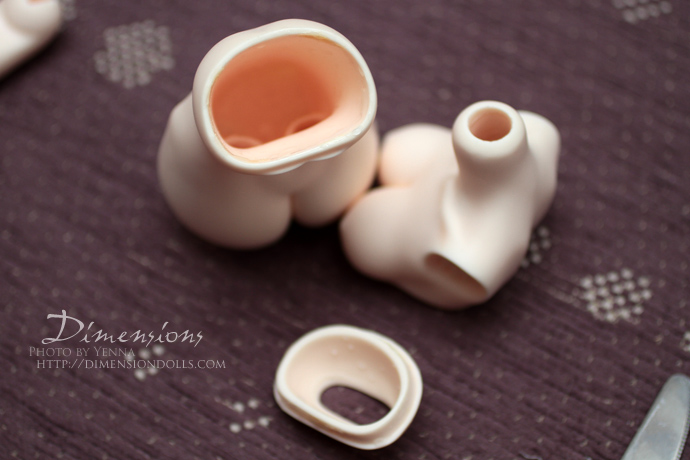
This is how the torso looks inside. Fairly hollow, which is good. Makes sawing a lot easier. Now a good idea to remove the stopper if there are no plans for a mod, because the torso will gap horribly without it.

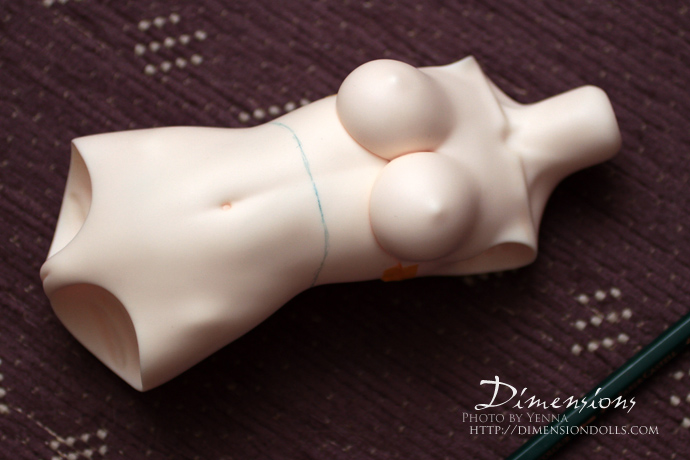
Next, I planned the position of the new joint


I taped the current joint shut to make it easier to visualize.

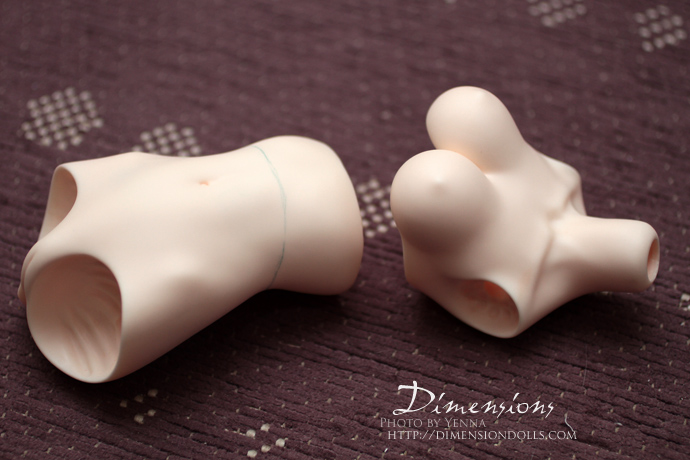
Not a very big piece coming off.
Sawing
I started with a small handsaw with a slim blade. The planned course is lower at the backside and higher on the front, so I started from the back and angled the saw blade slightly.


The hardest part was to get through the thick back.


But once I was through that the sides gave out like butter.


At this point it was getting hard to keep the saw angled right and to keep the whole thing symmetrical, so I switched to this mini tamiya saw. It’s quite flimsy but surprisingly sharp and had no trouble getting through thin resin.

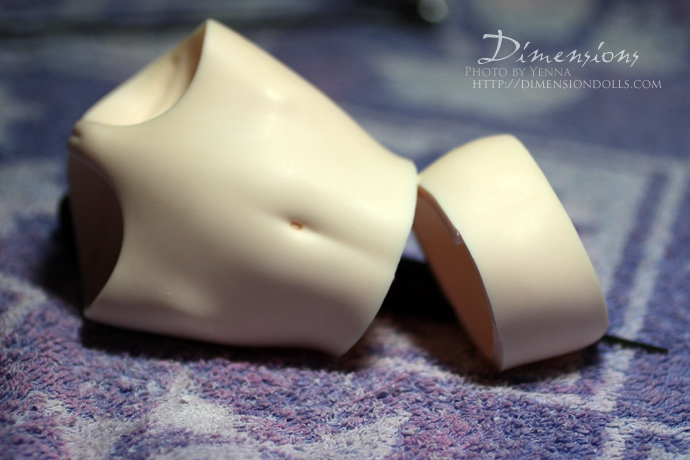
All the way through. I couldn’t match the ends 100% but sanding will fix it. It also ended a little assymmetrical due to not having the first saw positioned 100% right. But that’s fine.


These are basically the pieces I will need.
Epoxy & Sanding


I glued the old boob joint shut with some superglue just to keep it in place, and took some smooth type epoxy (grey colour) and started attaching it inside.


And lastly, I also epoxied the gap on the outside roughly. I didn’t bother going under both boobs on the front side, but the other one had a larger gap, so I stuck some in there as well.
Next up as a ton of sanding and shaping with a dremel:


Not very exciting, but took a long time.
The stopper


So, I took the stopper out with plans to use it for the new joint. Unfortunately it was quite a lot bigger than I thought.


I had to use the bigger saw again, and sawed off three edges. After that I spent forever grinding the piece against a large, very rough sandpaper in order to make it much, much smaller. It took probably longer than shaping the actual torso, and I gave myself a blister on my finger. x_x

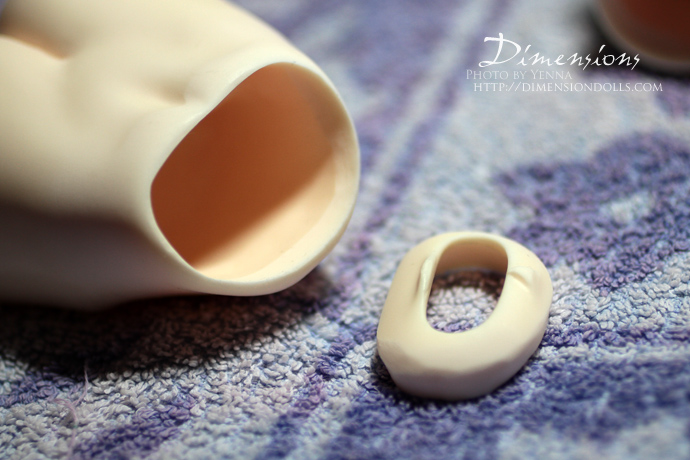
But I managed to make it small enough. :3


An okay fit. It gaps, but really, I didn’t feel like testing it after every sandpaper stroke, so I’ll live with it. It’s not like it’s ever very visible. And it’s still neater than an epoxy replacement would be because it’s the same colour as the rest of the body.


Can’t see the gaps from most angles anyway. I’m very happy with this. The back stopper still works for the torso, and the front one can be sanded flat, as it doesn’t have any use anymore.
Testing


So, I taped the stopper in place, strung the body up, and tested the shape. It’s a little wonky and needs some more sanding in the inside, but works quite well. I am not expecting perfect looks, as long as it poses better.
Unfortunately, since the torso is shorter, the bellybutton is really high (it was high to begin with) and it bothers me. So, I gave myself more work by deciding that she needs a new bellybutton.
Finalizing
Time to smooth out the epoxy in the old joint and what used to be her bellybutton.

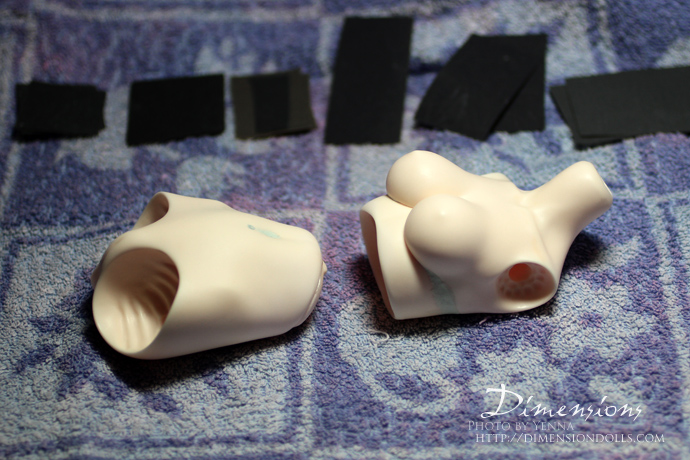


I got it quite smooth, but I really should’ve added more epoxy to begin with and it would’ve been better.


Got a beginning for the new bellybutton too


But I had to move on to smaller tools to finish it off.


Not perfect but pretty okay. Especially for me, since I tend to get lazy when I don’t like doing something. And I don’t like sanding.
Painting
I moved on to the airbrush, mixed some acrylic paint to match as closely to her skintone as possible and got to work. Time to fade that old joint line. Though, it doesn’t have to be perfect, since it’s not that visible. Her boobs hide most of it and Lily doesn’t go topless that much.


The harder part was to paint her old bellybutton over, because that area will easily get scratched by the new joint, but I hope it’ll stay intact. I also kept the paint layers as thin as possible, because it’ll get scratched super easily if there are a lot of layers. Thus, the coverage isn’t perfect, but it’s good enough for me.


Finally, she also got her usual torso blush with freckles. Tons of work. x_x
Final result


The final result is… good. The epoxy left some gaps because I fail, and the airbrushing doesn’t have complete coverage, but if she happens to go topless some day, I’ll just photoshop her. I do rather have a weird spot in her stomach than a bellybutton that’s too high, too. :P
The body ended up eerily similar to the DOC2 girl body I used to own. Long legs, short, slightly stubby torso. But as long as she’s no longer a stiff pain in arse to work with, I’m completely fine with that. She got shorter, which is good for the character too. (Now, if I shortened her legs too…)
Posing & Comparisons
And finally I’m comparing her to the original photos I took of the body when I reviewed it. You can go look at the whole thing in my flickr.
So sorry about the horrible editing of the photos, though. I just no longer had any energy to do them properly, and my flash was acting up too. x_x


My favorite improvement… think of all the natural poses~


Okay, that was the second favorite improvement, this is the favorite. It’s something I pretty much require for all my dolls, cause without this movement, they just can’t sit naturally.


Yeah, a movement range I personally don’t really need. Maybe once in a blue moon I want my dolls to lie on their stomach. Not pretty, but yeah, at least she bends where humans bend.

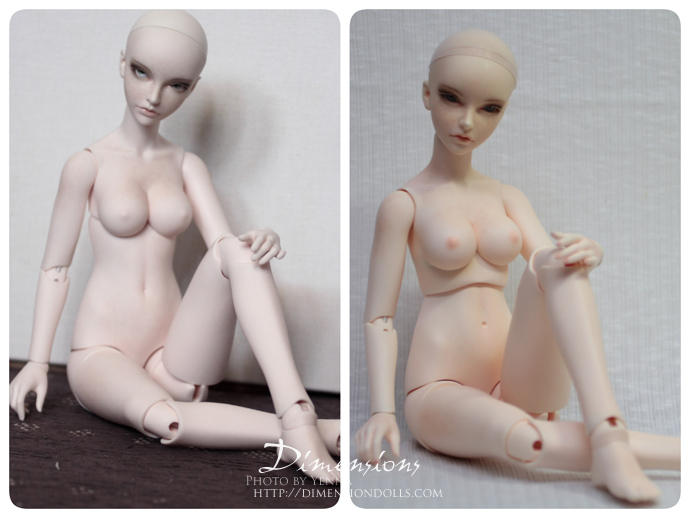
Lookit how much shorter her torso is. :’D More natural too.

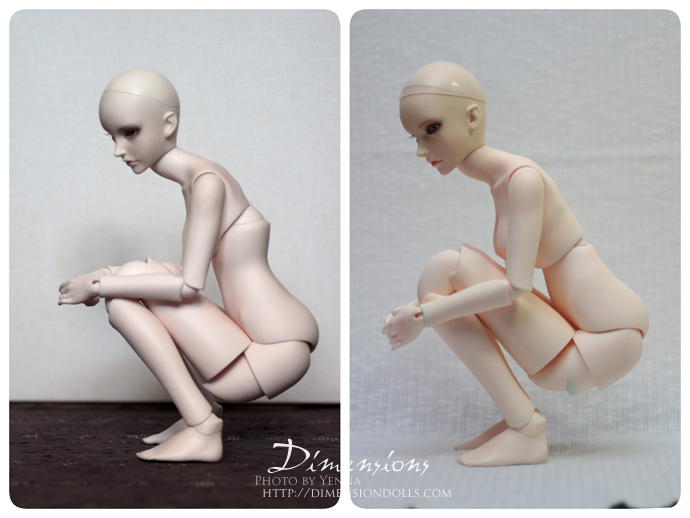
Huge improvement. (That extre ledge in her thigh joint is an earlier mod I did as a test, but it doesn’t work very well. It would need some improvements.)


Yeah, the pose I hardly need. Both look stupid from the front, but most clothes will cover that. The only issue with post-mod version is that her neck is in a forward position and thus she can’t lift her head as high. It’s because the pose of the neck has been designed for that rigid arched back pose she had.


Yup.


Uh’huh. (Not that I would ever need this pose, but hey, she can do it.)


And that’s it.
Interesting fact: my dad lent me the handsaw for this project, and then wanted to see the mod when it was done, although he doesn’t know much about my dolls. Well, I showed him the finished result and his reaction was pretty much “… …so, what did you do?” I told him I lowered the joint and showed him where the old one was (although he saw it before I started). And his reaction was “Why was it there? That’s such an odd place?” to which I said “YES! EXACTLY! I don’t get it either.” You know it’s an odd trend when someone not into dolls thinks it’s weird. x_x
I’ll be making her some new clothes when I have the time and taking some photos. I do not love how she’s got the mile-long-legs syndrome now, but she poses better so I can live with it. I do hope I can eventually get her a better head and possible some day a body that is shorter. This looks about right for her character, but it’s just too big.